Canon vs Fuji: R5 Fail

Last summer, I thought to upgrade from the Fuji X-T4 to the Canon R5.

It didn’t last long.

I spent ages poring over specs sheets online, checking image quality, etc.

As a geek interested in various forms of nature photography (closeup, landscape and astrophotography), for over a decade I’ve made a habit of shooting more than one RAW per output image. Whether the scene in front of me benefits from simply average-stacking, HDR, focus-stacking, pixel-shift or panorama, the more data captured at source, the better an image can be produced and the more future-proof it is against further revisiting, potentially years down the line.

Given that I do a lot of my photography during weekend hikes around the countryside, in any given day I’m likely switching between these drive modes on a regular basis as I react to what’s in front of me.

This is where the Canon R5 falls down. For all that the specs suggest it might be a “perfect” camera for landscape, in reality it’s anything but. I found are three areas of major fault that nobody in any “review” seems to have noticed:

  1. The electronic shutter is arbitrarily limited to no longer than 0.5s shutter speed. This renders it impossible to make a focus-stack where the individual frames are any longer than that – so loch-shore landscapes are out. I contacted Canon Support about this and they said they had no plans to fix it.
  2. The 14-bit read-out is only available in burst modes slower than H+; in that mode it drops to 13-bit, potentially making images noisier.
  3. Switching between focus-stacking and exposure-bracketing is a massive pain in the backside. I had to use the My Menu to bring the two drive-modes closer; even so, switching between the two requires entering whichever is enabled, disabling it, going into the other, enabling it and checking the parameters. You can’t store either of these drive modes as an aspect of a custom user mode. If nothing else, it slows me down in the field.
  4. Canon’s attitude – corporate “Big Photo”(TM) – where the EF lens mount is well established, the RF mount is relatively immature and they used patents to stop third-party manufacturers producing RF lenses to protect their profits. Legally fine, but doesn’t sit well with me as playing nice.

I got a few good photos out of it, but the above loomed too large, destroyed my enthusiasm for it – big regret.

So I sold it after only a few months.

Fuji brought out the X-H2 while I wasn’t looking and it is far better suited to my taste.

  1. I know Fuji users tend to like the rangefinder-style exposure controls, but this has sensible PASM controls that allow storing actually useful combinations of settings in my 7 custom modes. (C1 = walk-around aperture-priority starting from f/5.6, auto ISO, colour, AEB; C2 = serious tripod-using landscape in manual mode, base ISO, 1s for long exposures, b&w preview, pixel-shift, …)
  2. 40MP is a major leap forward in APS-C sensors. It goes without saying that it’s 14-bit in any drive mode.
  3. In a first for Fuji, it supports pixel-shift
  4. The drive-modes are a button-push away – all of them including in-camera HDR, bracketing, focus-stacking and pixel-shift – and can be saved as part of a custom user mode.
  5. Long exposures are timed up to 15 minutes! No need for Bulb mode!
  6. The more I use the camera, the more I appreciate little things that show how well thought-out it is – memorably, where other cameras – Sony! – have a USB-C slot for power, transfer and remote control, the Fuji X-H2 has the USB-C slot for the first two but remote cable release is a micro-jack socket on the other side of the camera. So for astrophotography on a star-tracker, it’s an absolute beast – external powerbank coming in, shutter triggering automatically and pixel-shift as a form of dithering on 1-minute sub-exposures, it doesn’t get any better.

I don’t normally much care for brand allegiance – I’ll shift from Olympus to Pentax to Fuji to Sony to Fuji to Canon to Fuji if I think they suit me best at a given moment (over many years, I might add!) – but I can’t help notice this is now the third time I’ve come round to Fuji… it’s almost a habit.
Gear Change Time

Back in May I had a bit of a holiday. Figured the primary camera would be occupied taking timelapse video sequences for a couple of the evenings, and what happens if I find something else to take a photo of? So a friend suggested I get a Fuji X-T20.

Loved it.

Sold the K-1 dSLR and all the other Pentax kit, bought a Fuji X-H1 and some nice lenses to augment it.

Having spent all last Friday having the day off for the purposes of swapping the gear, I called in at Portknockie to make some photos of the well-known Bow Fiddle rock. The tide was low, requiring more care scrambling over the rocks.

Getting a bit more artistic, a long exposure view of the clouds passing by and a toned and tweaked edit:

The Zeiss 12mm f/2.8 Touit Fuji X-mount lens is a beauty. Being for APS-C crop-sensor only, it’s comparatively small, but elegantly formed with the curves flowing from lens-hood to body where the aperture and focus rings are smooth rubber perfectly integrated into the body.

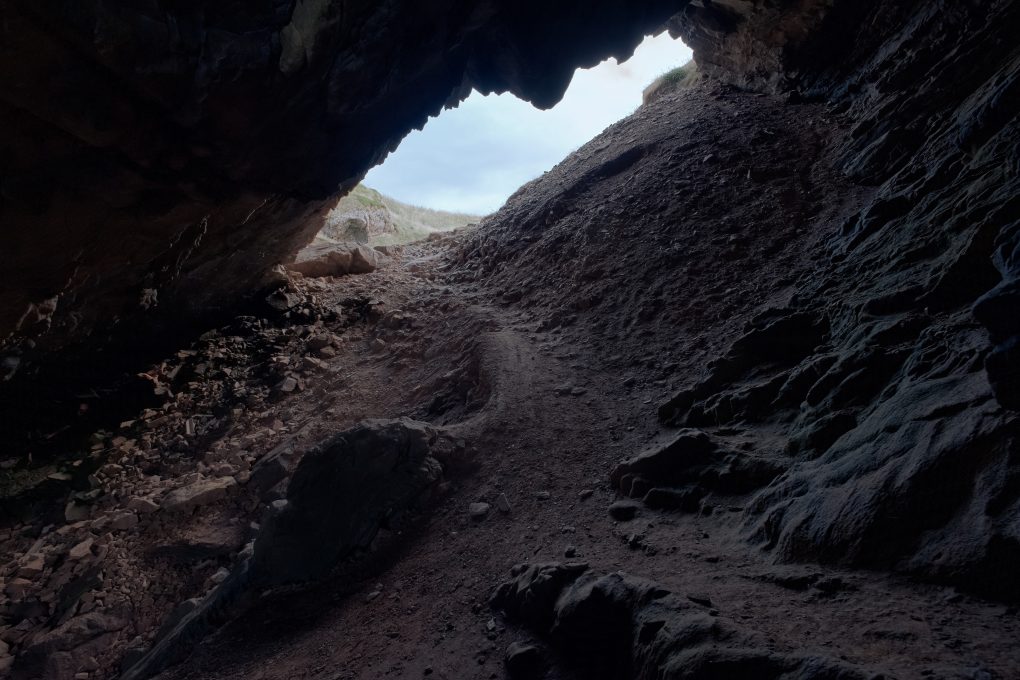
I still maintain the most interesting views are to be found within the caves beside Bow Fiddle, not just staring at the lump itself. This is the first test image made with the Zeiss lens – sitting inside one of the caves, looking out, an HDR composite of 5 frames ±2/3EV each and even so it took a delicate touch getting the best RAW conversion and blend (haven’t used LuminanceHDR in ages!).

Testing my newly acquired Zeiss 12mm f/2.8 Touit lens – inside one of the caves looking out, of necessity a 5-shot HDR ±2/3EV. That lens is awesomely sharp, even with slightly elevated ISO around 640-1600.

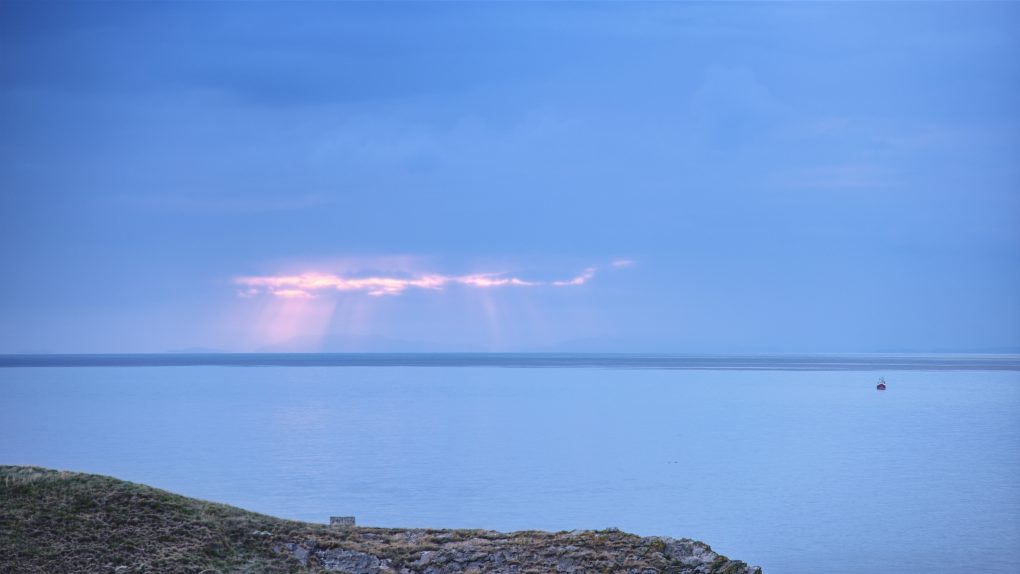
Finally, one to relax with: the most serene simple composition of blue-grey sky with warm crepuscular rays spreading from behind a cloud. Light and sea, what more does one need?

Beautiful simplicity: a very cool blue-grey sky with orange crepuscular rays in the distance.

Around Here: testing the Fuji X-T20

A couple of weeks ago it occurred to me that, with a holiday looming and desires of taking lots of long timelapse photos of an evening, should I wish to take other scenes while timelapse was recording I’d be out of luck with just the one camera. And so on a whim I followed a friend’s advice and bought a second shooter, a Fuji X-T20.

It’s totally amazing – “the Little Camera that Can™” – personified. Diametrically opposite to everything I’ve become accustomed to with the Pentax K-1: custom user-modes do not encapsulate drive modes such as burst-rate, bracketing or intervalometers, just some rudimentary exposure (auto)-ISO settings and things; and the JPEGs are absolutely stunning, with targets defined within colour-space not by intended purpose (“landscape”, “portrait”) but rather by film-emulation.

It’s so good I’ve reworked my entire RAW-processing workflow such that images from both cameras now look like the Fuji’s out-of-camera JPEGs whilst emulating Fuji Provia slide film of old. Quite some drastic changes required over and above the default RawTherapee profile – most notably yellow-greens are dramatically deeper and greener and there’s a “Fuji red” going off. It’s nice to have a point of reference in colour-space, so I know what’s “normal” and where processing deviates from it.

Anyway. Some quick snaps taken one lunchtime stroll through nearby woods:

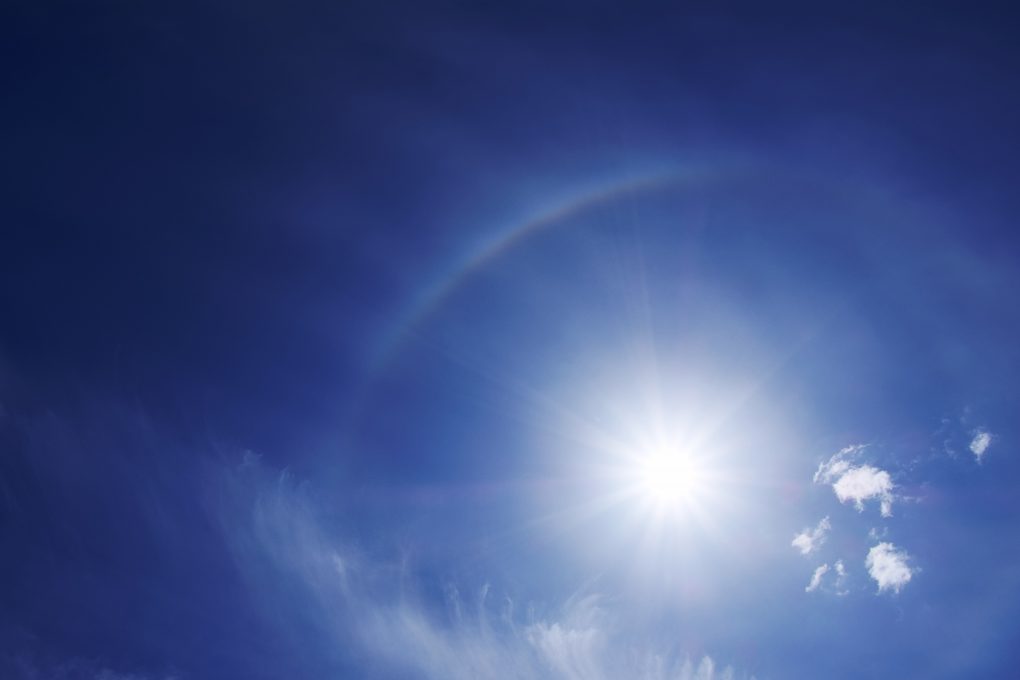
And my favourite of all, a partial 22º solar halo – the first photo of the walk:

Having just returned from the holiday that prompted the acquisition, it’s interesting just how fast it’s become my primary choice of camera if only for reasons of lighter-weight whilst travelling.

Olympus Pen-F: analysis and hands-on

Mine, my only, my preciousss!

Mine, my only, my preciousss!

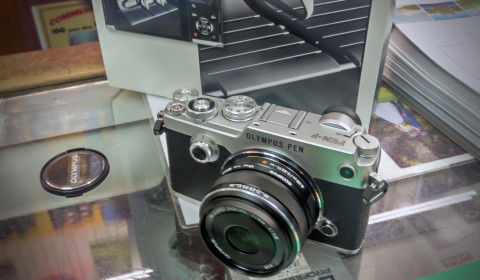
There’s only one camera shop left in Perth and yesterday I was their first customer to buy the Olympus Pen-F. It’s not released on Amazon until Monday…

So it’s been the talk of the web. It’s undeniably a beautiful camera, with a rangefinder design reminiscent of its film camera predecessor of the same name. I’ve spent much of the last couple of days putting it through its paces.

I’m pleased to report it has a reasonable sturdy weight to it thanks to the aluminium/magnesium alloy shell. It feels just great in one’s hands. Well, my hands, anyway.

How does it perform?

First, software: it’ll be a little while before Adobe support it, but for us open-source fans, RawTherapee already supports the new .ORF RAW images in both 20-megapixel and hi-resolution 80-megapixel modes. (It seems to be the only open-source raw-converter to do so, at the time of writing.)

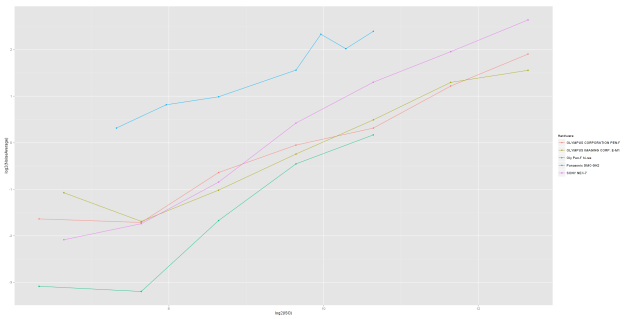
Second, I’ve been keeping dark-frame reference images for a few cameras, so I can compare its noise levels against predecessors and competitors. (Method: put the lens-cap on, place camera upside-down on desk, and then at every ISO from 6400 to 100 and below, at various shutter-speeds from 1/250s to 30s, take a couple of photos. A quick Python script reads the images, converts to greyscale and outputs various properties including the average lightness value per pixel.) Results aggregated by camera model and ISO with median-average.)

log-log plot of luminosity noise for various camera models by ISO

log-log plot of luminosity noise for various camera models by ISO

The graph shows 3 things, none surprising but pleasant to see confirmation:

  1. The Lumix GH2 really was awful for sensor quality. Its ISO160 is the Sony NEX-7’s ISO 800.
  2. There is a reasonable progression from Lumix GH2 to Sony NEX-7 to Olympus E-M1 and Pen-F; at native resolution, the E-M1 and Pen-F are much of a muchness for L-channel noise.
  3. The real game-changer is the high-resolution mode on the Pen-F – good, since this is one of the main reasons I bought the camera. This is to be expected: it uses the in-body stabilization to blend 8 images, four of them offset by 1 pixel (so it has full chroma bit-depth at every pixel) and four offset by half a pixel (so it has double the linear luminosity resolution). The result is about 1.5 stops better noise-performance.

Hi-res mode comes with a few limitations: the maximum ISO is 1600; aperture only goes down to f/8; shutter speeds only as long as 8s. You can enable picture modes such as natural, vivid, monochrome etc; however it does not work with bracketing or HDR mode: for HDR, it’s best to work manually.

One interesting point in favour of high-resolution mode: it does not stress the lens’s performance; at no point does it take an image of more than the native resolution, so if the MTF curves of contrast vs spatial frequency are adequate for 20 megapixels, the lens is also good enough for 50-80 (more later).

Hands-on: what’s it like in the field?

I took both current cameras out for a drive around the Highlands of Perthshire this afternoon, the NEX-7 with its kit 18-55mm lens and the Pen-F attached to a new 17mm f/1.8 prime.

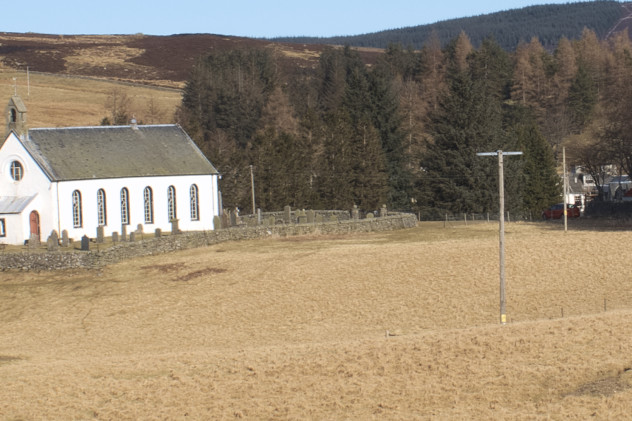
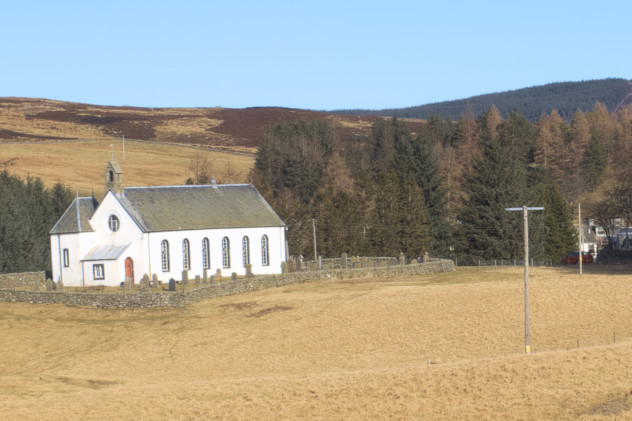
Here’s a quick overview of four images: one from the NEX-7, two straight from the Pen-F’s own JPEGs out of camera (just downsized for presentation here) and one converted in RawTherapee:

My first real image from the Pen-F: Amulree and Strathbraan Parish Church at the end of Glen Quaich.

The Olympus images all have the same white-balance; I set the ORF and NEF files to the same whitebalance as the Pen-F chose automatically. It’s interesting that the sky is a proper shade of blue in the converted RAW; this might be a difference of profile between RawTherapee and the camera’s own internal JPEG engine. (Fine by me – I much prefer solid blue skies to cyan ones.)

What about the details?

Now this is a hard question. No doubt the resolution suffers and 80MPel is rather optimistic. Here we compare the NEX-7 against the 20MPel and 80MPel RAW files with no sharpening or detail controls enabled at all:

Obviously the 80MPel image is going to take a lot ofsharpening to bring it up to scratch.

My preferred sharpening algorithm with the NEX-7 has long been deconvolution. However, despite tweaking the radius, strength, dampening and iterations controls a lot, RawTherapee doesn’t seem to have the strength to sharpen the 80MPel hi-res RAW.

The out-of-camera JPEG appears to have a cruder sharpening algorithm with a lot of local contrast, so I switched to unsharp mask. At 80MPel, with enough USM to render the individual stones in the dry stone wall adequately sharp, this reveals serious anti-aliassing issues around straight-line edges:

Pen-F edge-aliassing artifacts

Pen-F edge-aliassing artifacts

These artefacts disappear when downsized to 50MPel in camera. Then again, the in-camera JPEG conversion is very contrasty and over-sharpened, so there’s room for improvement all-round:

In-camera JPEG conversion (20MPel) vs RawTherapee downscaled from 80MPel RAW

In-camera JPEG conversion (20MPel) vs RawTherapee downscaled from 80MPel RAW

Update: by adjusting the USM parameters, I’ve removed much of the artifacts around edges. There are still problems where blades of grass have moved between source frames, but static objects with strong outlines no longer cause such problems.

disable edge-only and halo-detection, just use less USM to start with

disable edge-only and halo-detection, just use less USM to start with

There are other demosaicing algorithms in RawTherapee and other ways of sharpening (newly added wavelet support). Plenty of scope for experimenting to get the best out of this thing.

What’s the verdict?

I absolutely love using it. Where other cameras drive the megapixel race by giving increasingly large images for everything (40MPel+), this camera ticks along at a more than adequate native 20 megapixels for most purposes with the option of taking one’s time to crank out the tripod to make absolutely huge images. This suits me fine – I’ve spent so long doing similar image-stacking/super-resolution trickery as part of the post-processing workflow, it’s great to have the camera do it instead.

The in-body stabilization is excellent. I managed to hand-hold 10 frames at 1/10s at the Falls of Dochart, twice, without a single blurry image.

There are lots of other features to look forward to – I’ve never had the patience to try focus-stacking, but moving it in-camera is very appealing.

With a subtle adjustment to the brighter blues to cater for skies, I could probably live off the camera’s own JPEGs for many purposes.

New lenses and filter adapter rings have been ordered…

Gratuitous sample images

As if the above weren’t nice enough, here are three more images from this afternoon.

Then and Now, Night and Day

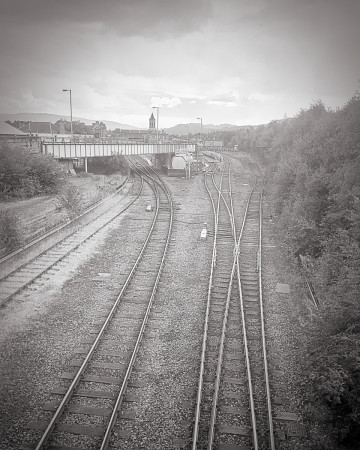
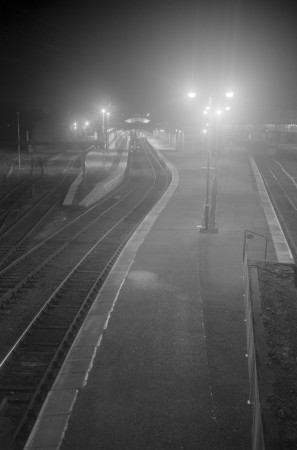
Some time around March 2007 I acquired an ancient camera, an Ensign Carbine No.3, and took a photo of Perth railway station by night, returning home to develop the film myself. It’s the only photo I remember taking with that camera, but I like it for the Ilford Pan-F tonality and glow from the lens-haze.

Today, on my lunchtime stroll around town, I took a quick photo on the mobile, looking back along the same railway tracks to the station from the other side.

Perth railway station taken from Glasgow Road using a mobile phone camera (2014)

Perth railway station taken from Glasgow Road using a mobile phone camera (2014)

Perth railway station at night, taken on the Ensign Carbine No.3 with Ilford PanF+-50 film (2007)

Perth railway station at night, taken on the Ensign Carbine No.3 with Ilford PanF+-50 film (2007)

My Favourite Camera Settings

14307072596_4274cbb434_b

There’s one particular combination of camera settings I keep coming back to, that forms a base for almost all my work. Just in case anyone else is interested:

13062909705_90d82315ac_b

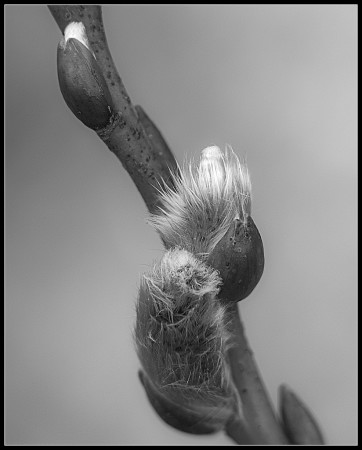
Great Success: a replanted willow tree budding, in black and white

Circular polarizer filter: for acting as an optical control of local contrast

RAW+JPEG: so I have vast amounts of data to process properly and a reference of what the camera thought of it, which can also be recovered more easily in case of SD-card corruption (rare, but not unknown)

Mode: maybe 90% aperture-priority (auto-ISO, auto-shutter speed), 5% shutter-priority (auto-ISO), 5% manual (because the NEX-7 fixes ISO to 100 by default); of these, unless I’m doing a long exposure, the aperture is the most distinguishing control between closeup and landscape work.

Processing: black & white, so I get to think in terms of shape and form and colour-contrast even if sometimes a scene is processed for colour.

13063247864_2c71267357_b

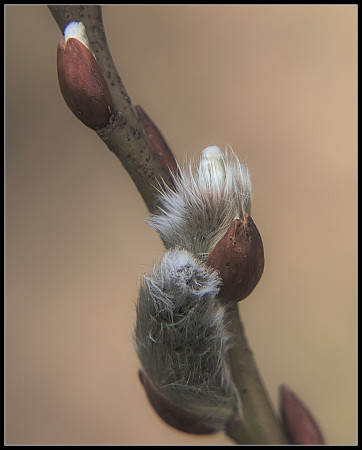
Great Success: a replanted willow tree budding, in colour

Metering: matrix/multi-zone metering, because it’s quite good enough, especially when coupled with a histogram on-screen

Compensation: normally +1/3rd EV for reasons of expose-to-the-right, improving the signal-to-noise ratio.

Shooting: HDR +/-1 EV

The shooting-mode is a new departure; not because I’ve suddenly started “doing HDR” (I’ve been open to that workflow on demand for several years), but rather because the ability to produce 30-40megapixel photos requires multiple input images. By shooting hand-held at high frame-rate I get enough image-data to combine upscaling (using super-resolution) with noise-reduction (using stacking). Full-speed burst-mode on the NEX-7 is a very fast 10fps, which leads to taking bursts of 5-6 images by the time I’ve thought I’ve got 3; the camera enjoys a wide dynamic range so even if the scene contrast doesn’t require HDR per se, there’s only a little difference in quality and using the HDR bracketing restricts the burst to 3 frames at a time.


14178175892_3edd915e02_b

A little barn: scenery from Steel Riggs on Hadrian’s Wall

My Photography Zen just ran over your Dogma

In a previous life I used to attend the local photography club; there were ups (friends; winning the occasional competition; being involved, mostly in geekish matters; making the occasional presentation) and some noteworthy downs (a very rude judge; a feeling that photos were judged according to how “lucky” they were to have been found, rather than appreciating skill in the making). On the whole, however, they were welcoming and friendly and it was generally “my” club.

So, now we’ve settled elsewhere in the country, I thought I’d investigate the local camera club.

Such conversation as there was was mostly limited to willy-waving equipment:

  • someone’s selling their Canon 550D and someone else has a 7D. I don’t care; show me the results from either.
  • “oh yeah, oh yeah, Sigma’s a good make. I’ve got a Tokina 11-16mm lens, that’s quite wide-angle”. Immodest one-upmanship, as though one’s lens’s field of view is something to boast about.
  • “I don’t use Photoshop. I figure if you’ve spent thousands on a good camera…”. Well good for you; if I’d spent thousands on my camera I’d consider it imbalanced not to be matched in complexity of software.
  • “I don’t use Photoshop. It makes competitions unfair, that someone puts in the work to do it correctly in-camera and someone else takes a lousy photo and makes it good”. Wake up: post-processing is a necessary part of photography, and at least they’re getting results.
  • “So what do you use?” A Panasonic. “Oh.” Pause. “I have a Nikon” (points to bag emblazened with a Sony logo). I’m as glad for you as the results you get are good.
  • I bought a 100-400mm lens for £650; the chap selling it said it had auto-focus but I was disappointed when it didn’t”. Tough luck; my favourite lens cost me £40 on eBay.

It being the first night of the season, there was a short presentation of a selection of images (of varying degrees of appeal; “sorry but we haven’t calibrated the projector yet” – and it showed, as the red channel was completely blown) and an awful lot of laying-down rules about competitions (down to 2 photos per contributor per competition, inexplicably; a meagre 1024*768px size for digital submissions).

The arguments are old, tired and banal. There was no evidence of people being interested in each others’ choice of subject-matter or approaches to it – what makes them tick as photographers, people, artists. Like landscape or find it too anyone-can-appreciate-it common-denominator? Like portraiture? Sports? Abstract art, fine art? Microscopy?

As a parallel to the hardware fixation, all talk of software – including, critically, “advancing one’s photography” – centred on Adobe Photoshop, as though it were the only tool out there.

Nature:TNGTo state the obvious, photography is not about hardware – the clue’s in the name: light-writing; it’s about image – the image – and what thoughts it evokes in one’s brain. Advancement is a matter of choice, control (pushing the right buttons for desired outcomes) and knowledge – the practical experiences of requirements and attainability at time of shooting and of rationally choosing settings for their consequences as a function of the image-space (rather than as individual corrections or tweaks) in post-processing.

Nor is post-processing all about Photoshop either – but I know what saturation, high-pass sharpening, barrel-distortion-correction and channel-mixing do to an image, and I know how my particular camera behaves with noise arising from high ISO as distinct from longer exposures, and that I prefer to remove both kinds of the camera’s noise as much as possible only to reapply synthetic grain using a Perlin noise generator. All are functions of the image, independent of the software being used.

From experience, the best a competition can do is assign a score – subject to the judge’s biases – and, typically, make some superficial remarks about if one were to “…just tweak the sharpness a bit”… as though there were only one such control (I can think of simple, deconvolution, unsharp masking, high-pass, refocus and Wiener sharpening algorithms off the top of my head – which of these do they just mean?!). This does not lead to advancement.

I do not have to subscribe to their arbitrary rules, limitations and regulations.

I will not be attending that photo-club.

I have images to be making!